The reason I do so many projects myself is that I can never find exactly what I am looking for. I wanted something to sort my jewelry but everything looked really dated and not in a good way. I found a few that were ok but they were either not the right size or too expensive. I decided I needed to make my own!
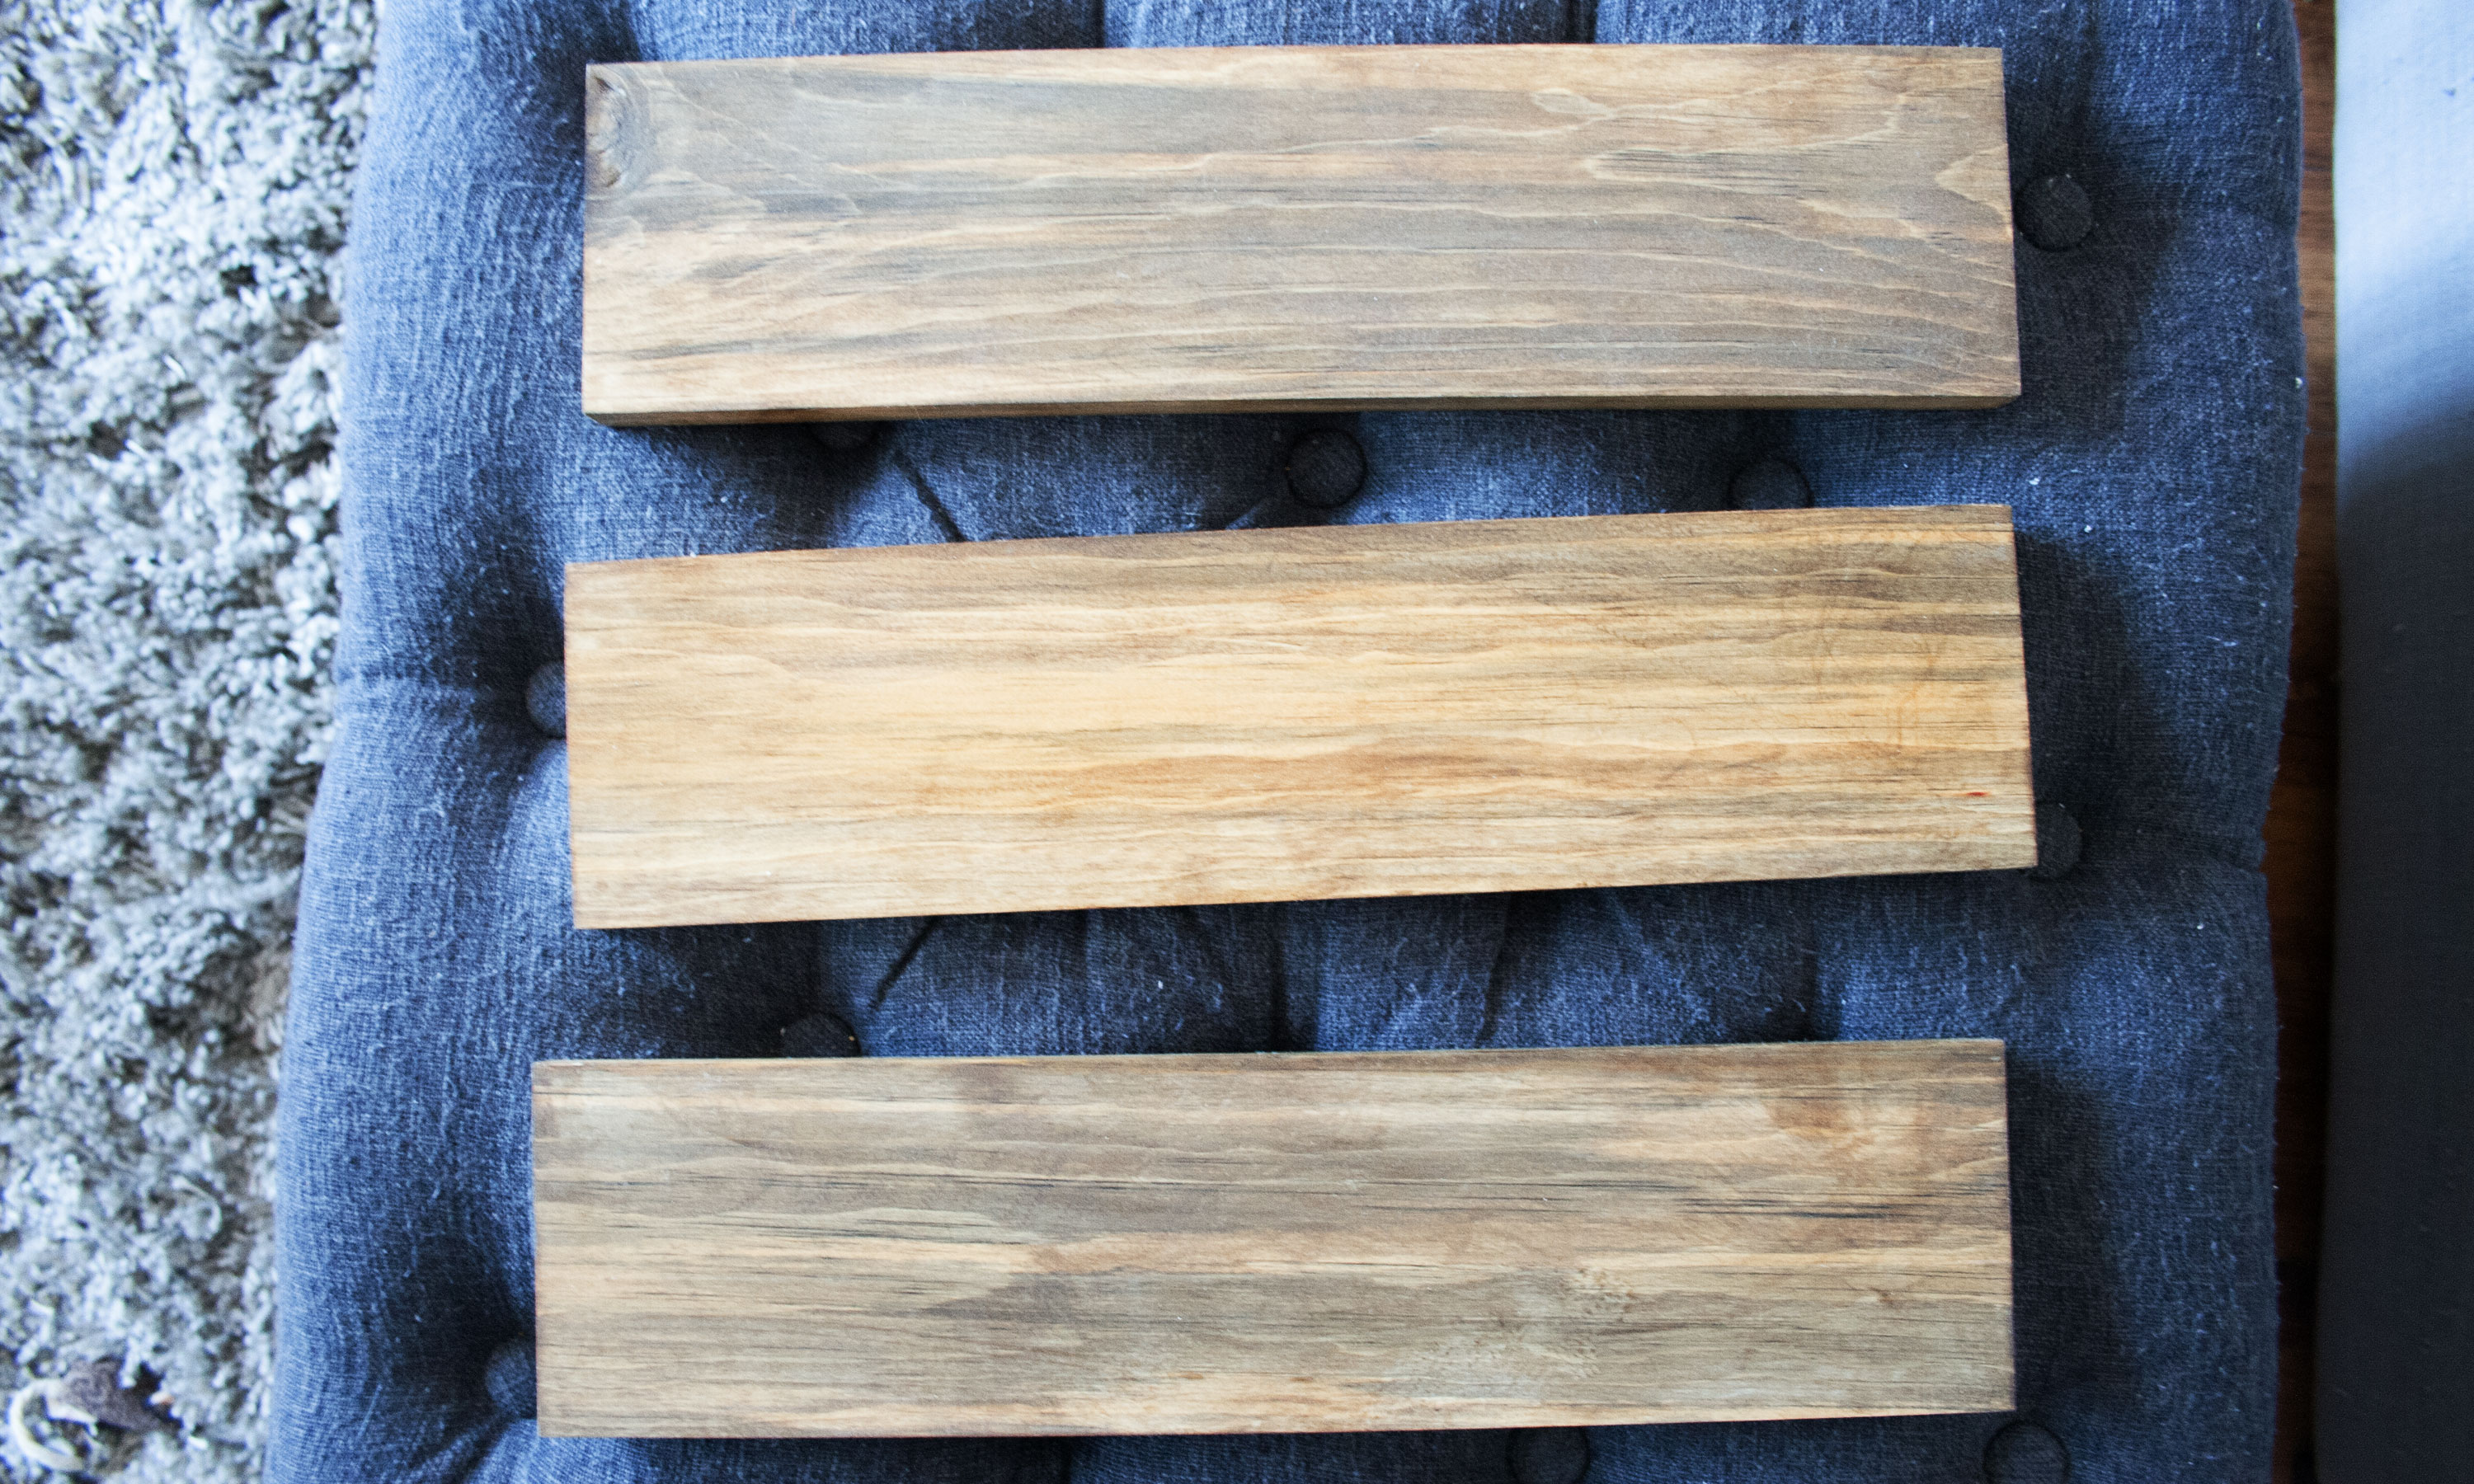
Guys…. I have a wood guy. I don’t mean to brag but everyone should have a wood guy. He’s our favorite at our local lumber store. I walk in there exclaiming things like, “I’m making my own dining room table, what wood do you recommend?” He never lets us down. He told me the above wood would look really nice once stained and he did not let me down! It had this bold gray streak running through it which first intimidated me but he lead me down the right path. I gave him my dimensions and paid around $6 for the above 3 pieces (once one long thin piece of wood).

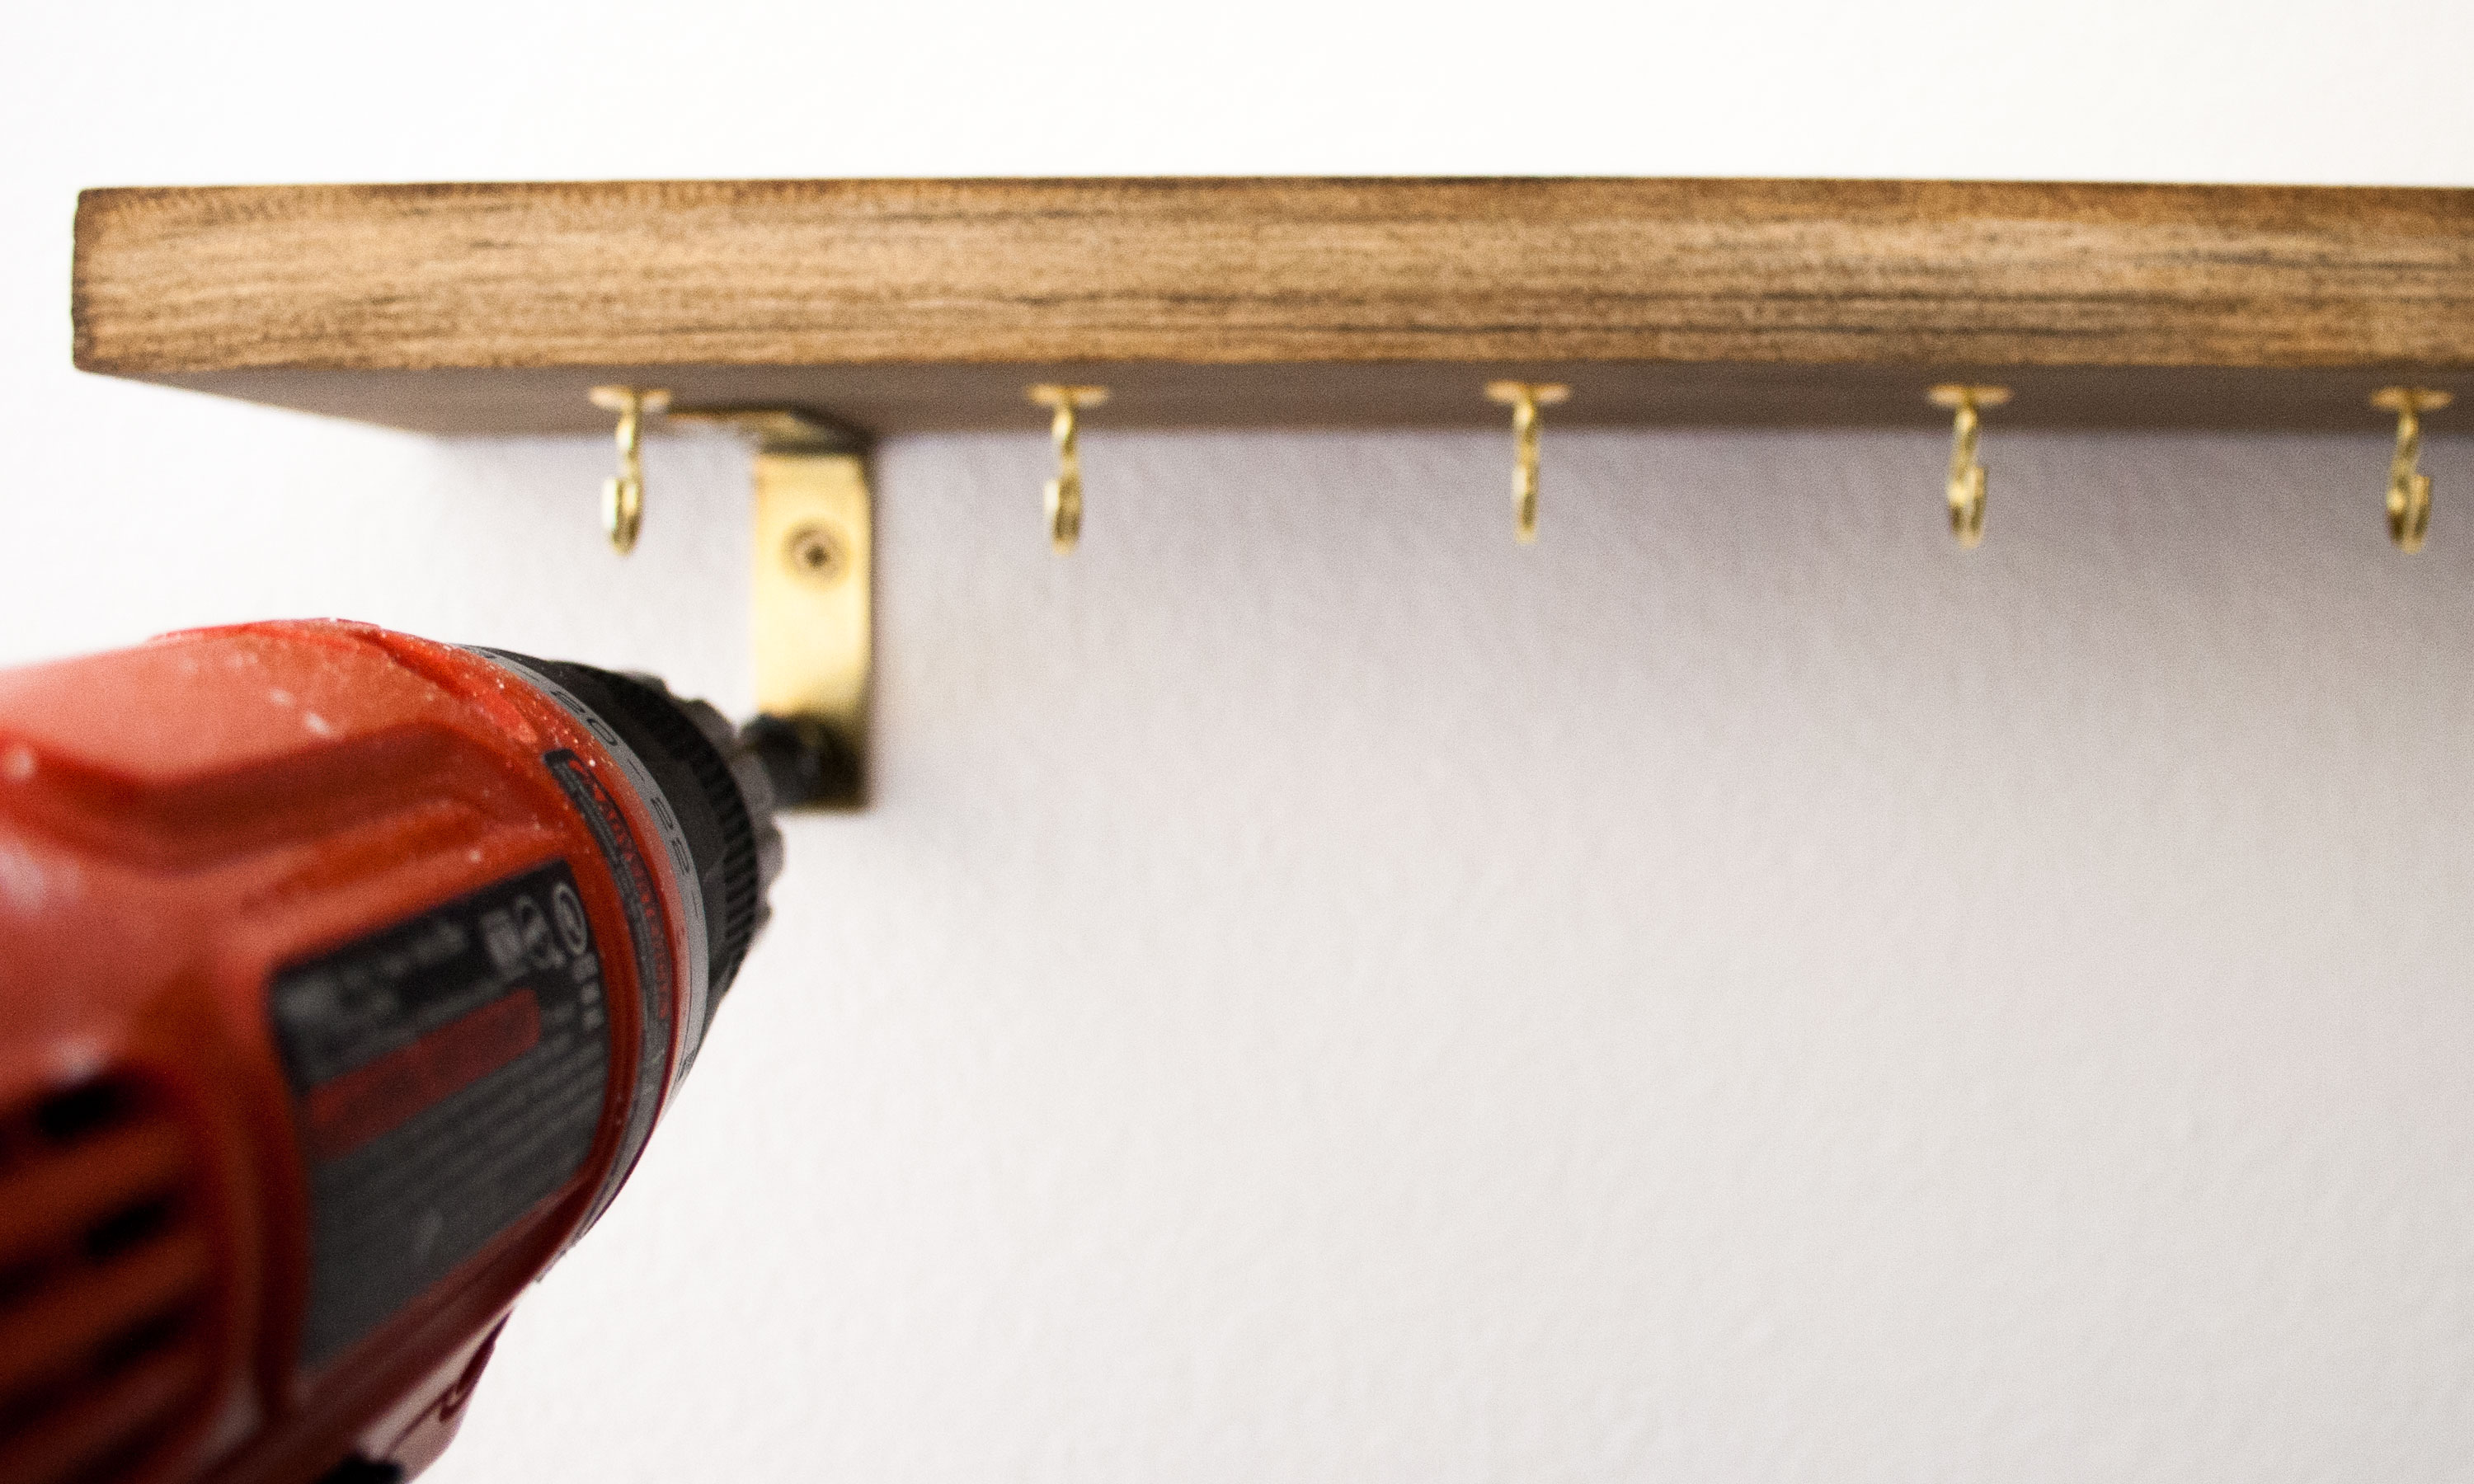
After adding a coat of stain and spraying some fast drying polyurethane spray (which I already had from previous projects), it was time to add the brass hooks and L brackets. I also measured out where I was going to drill the holes to screw in the brass hooks and marked them with a sharpie.
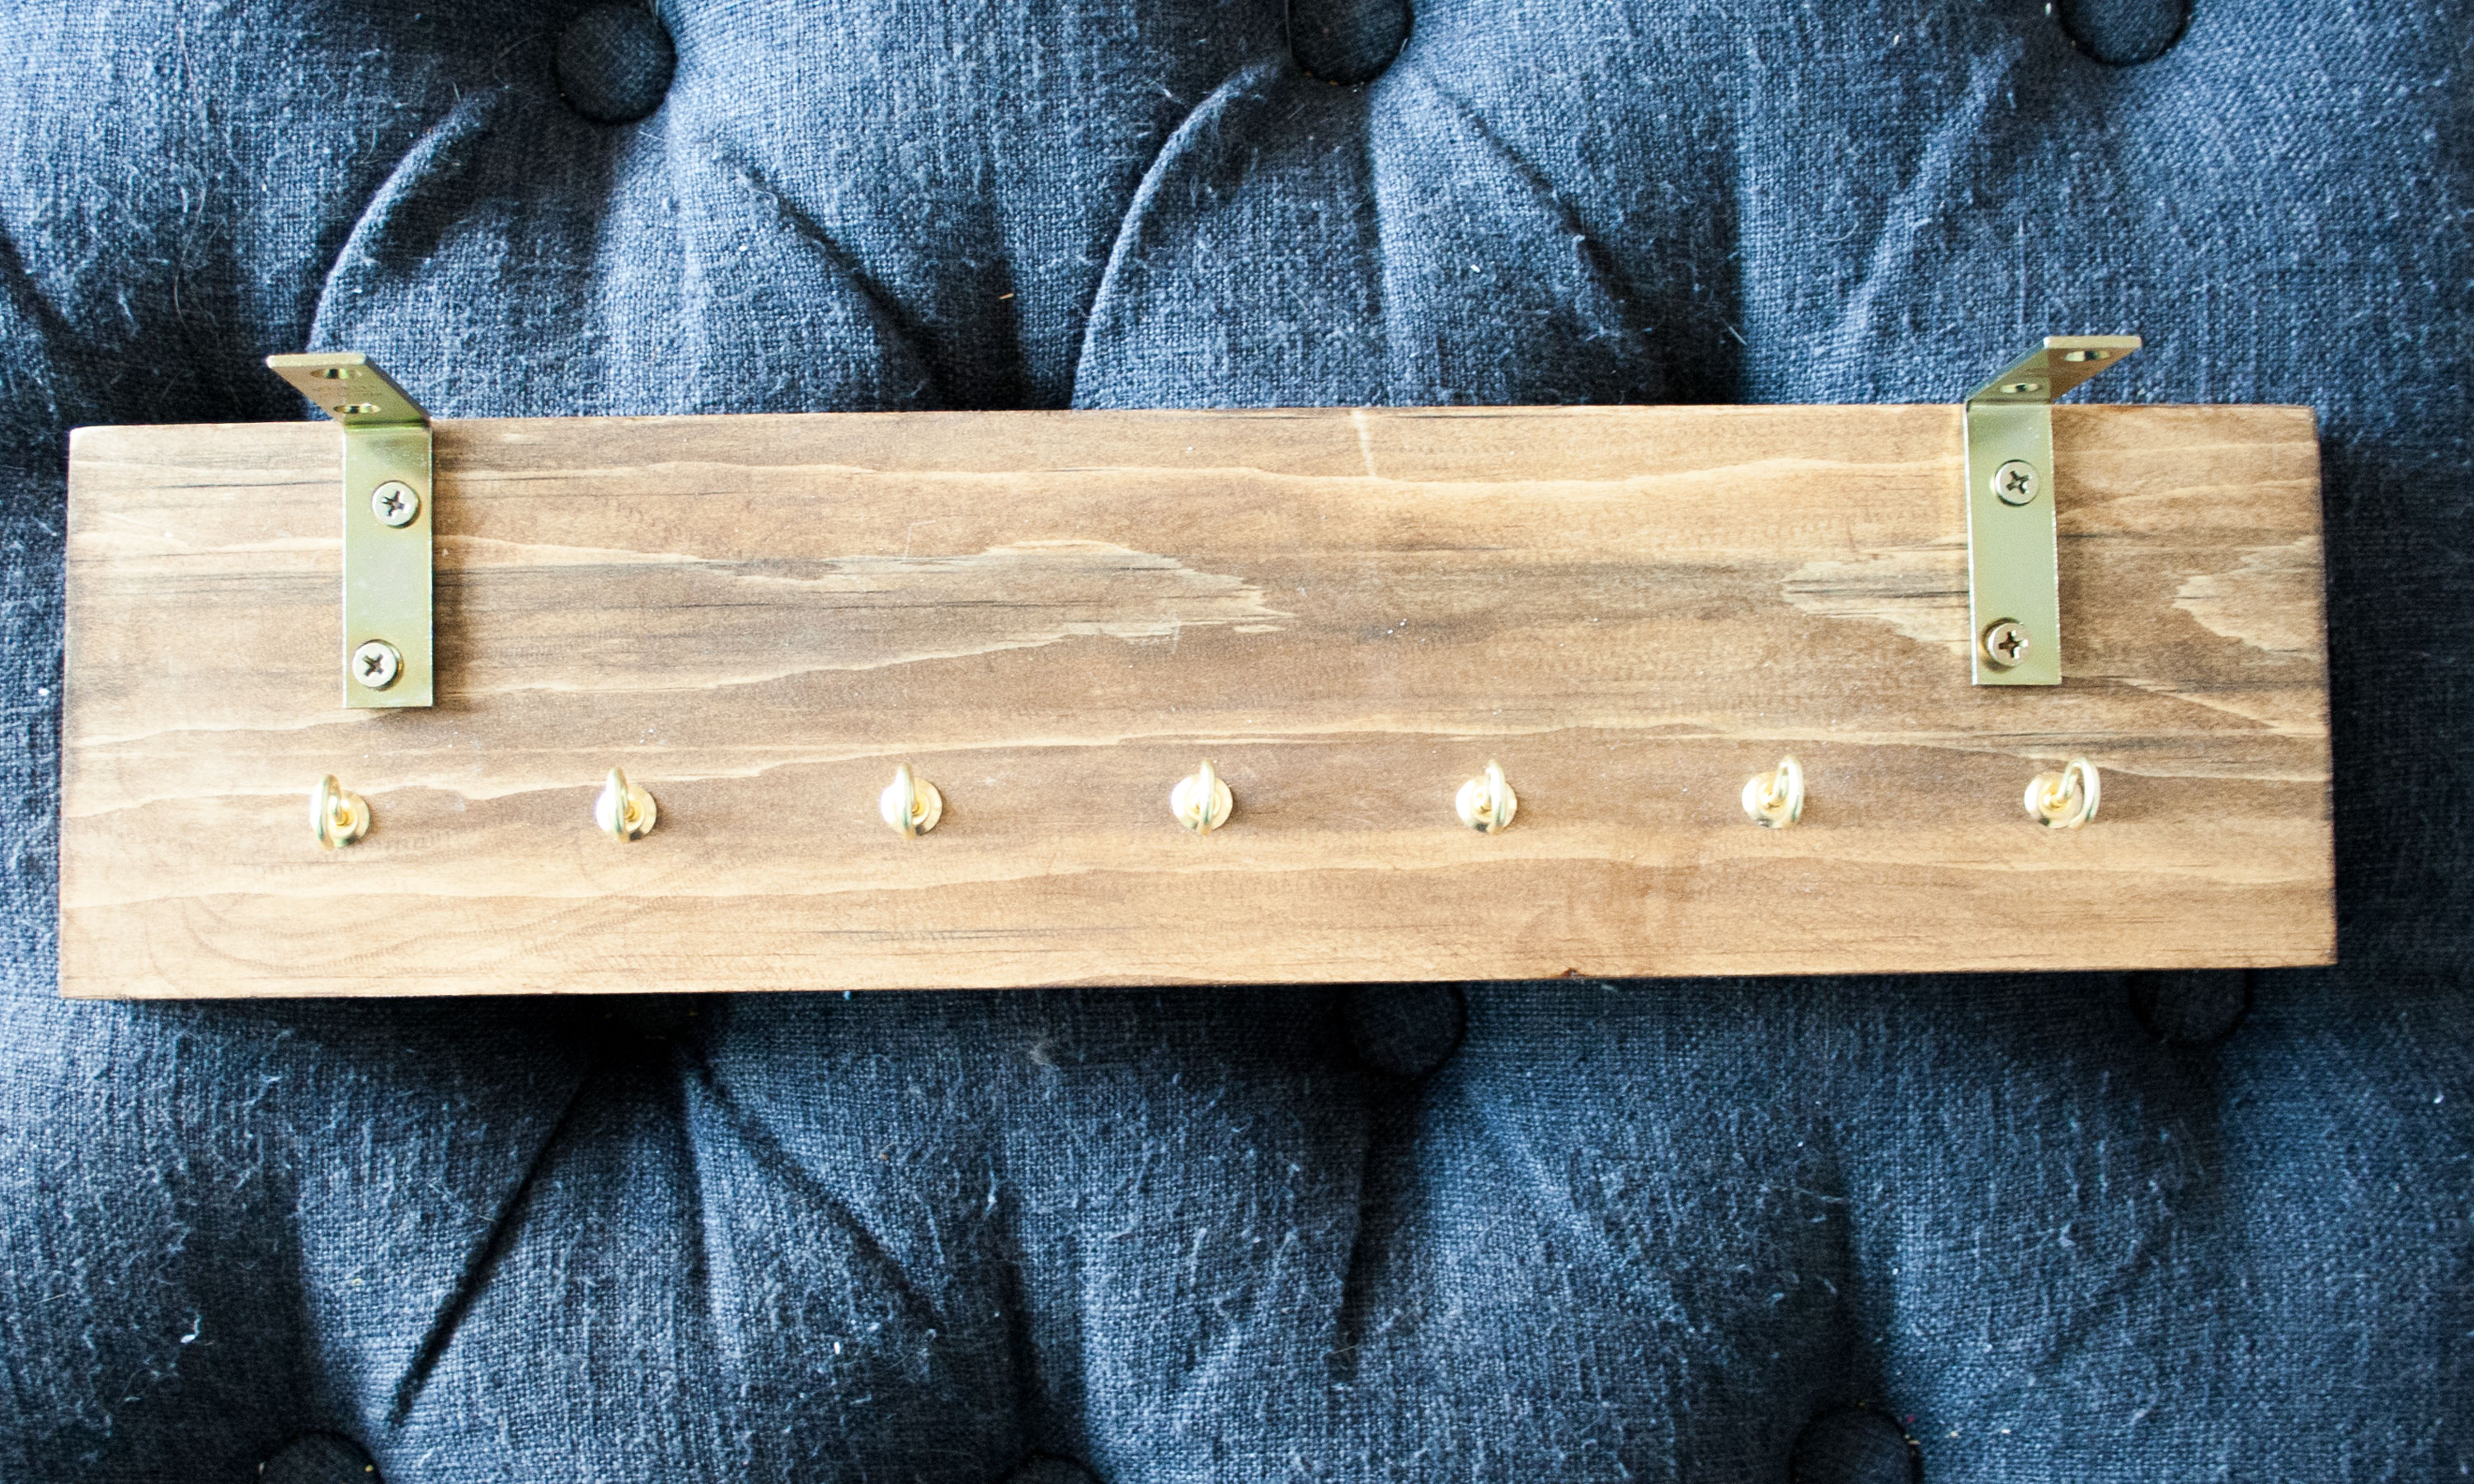
I used a drill bit to make holes so when screwing the brass hooks in it was super easy.
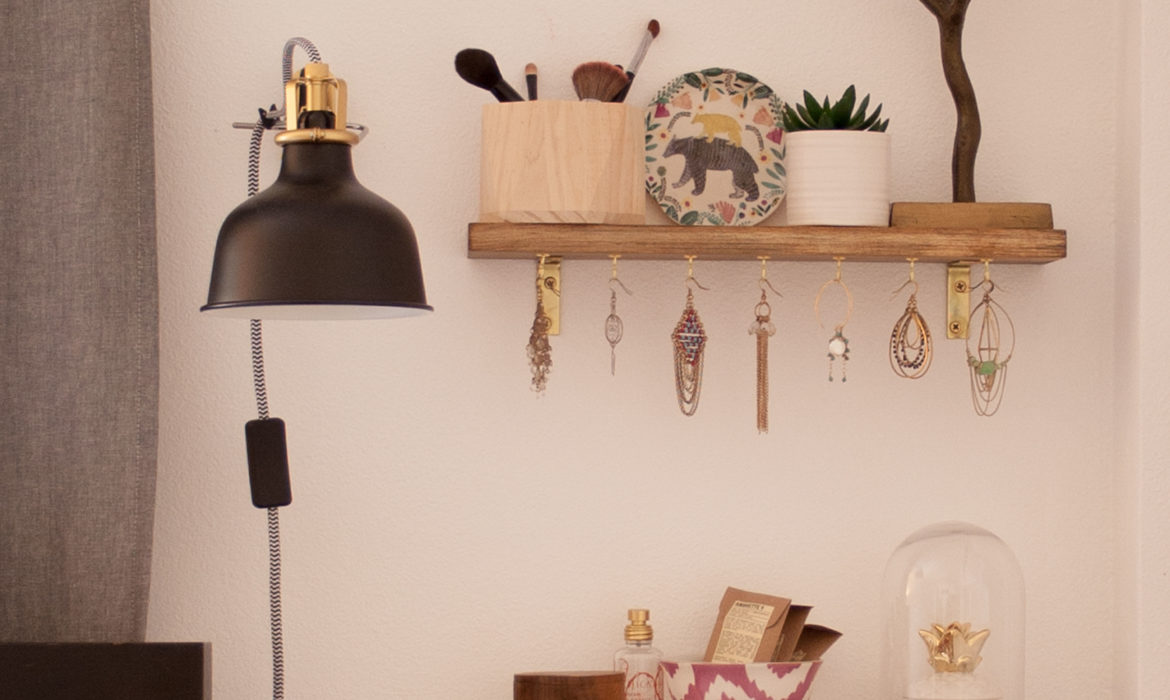
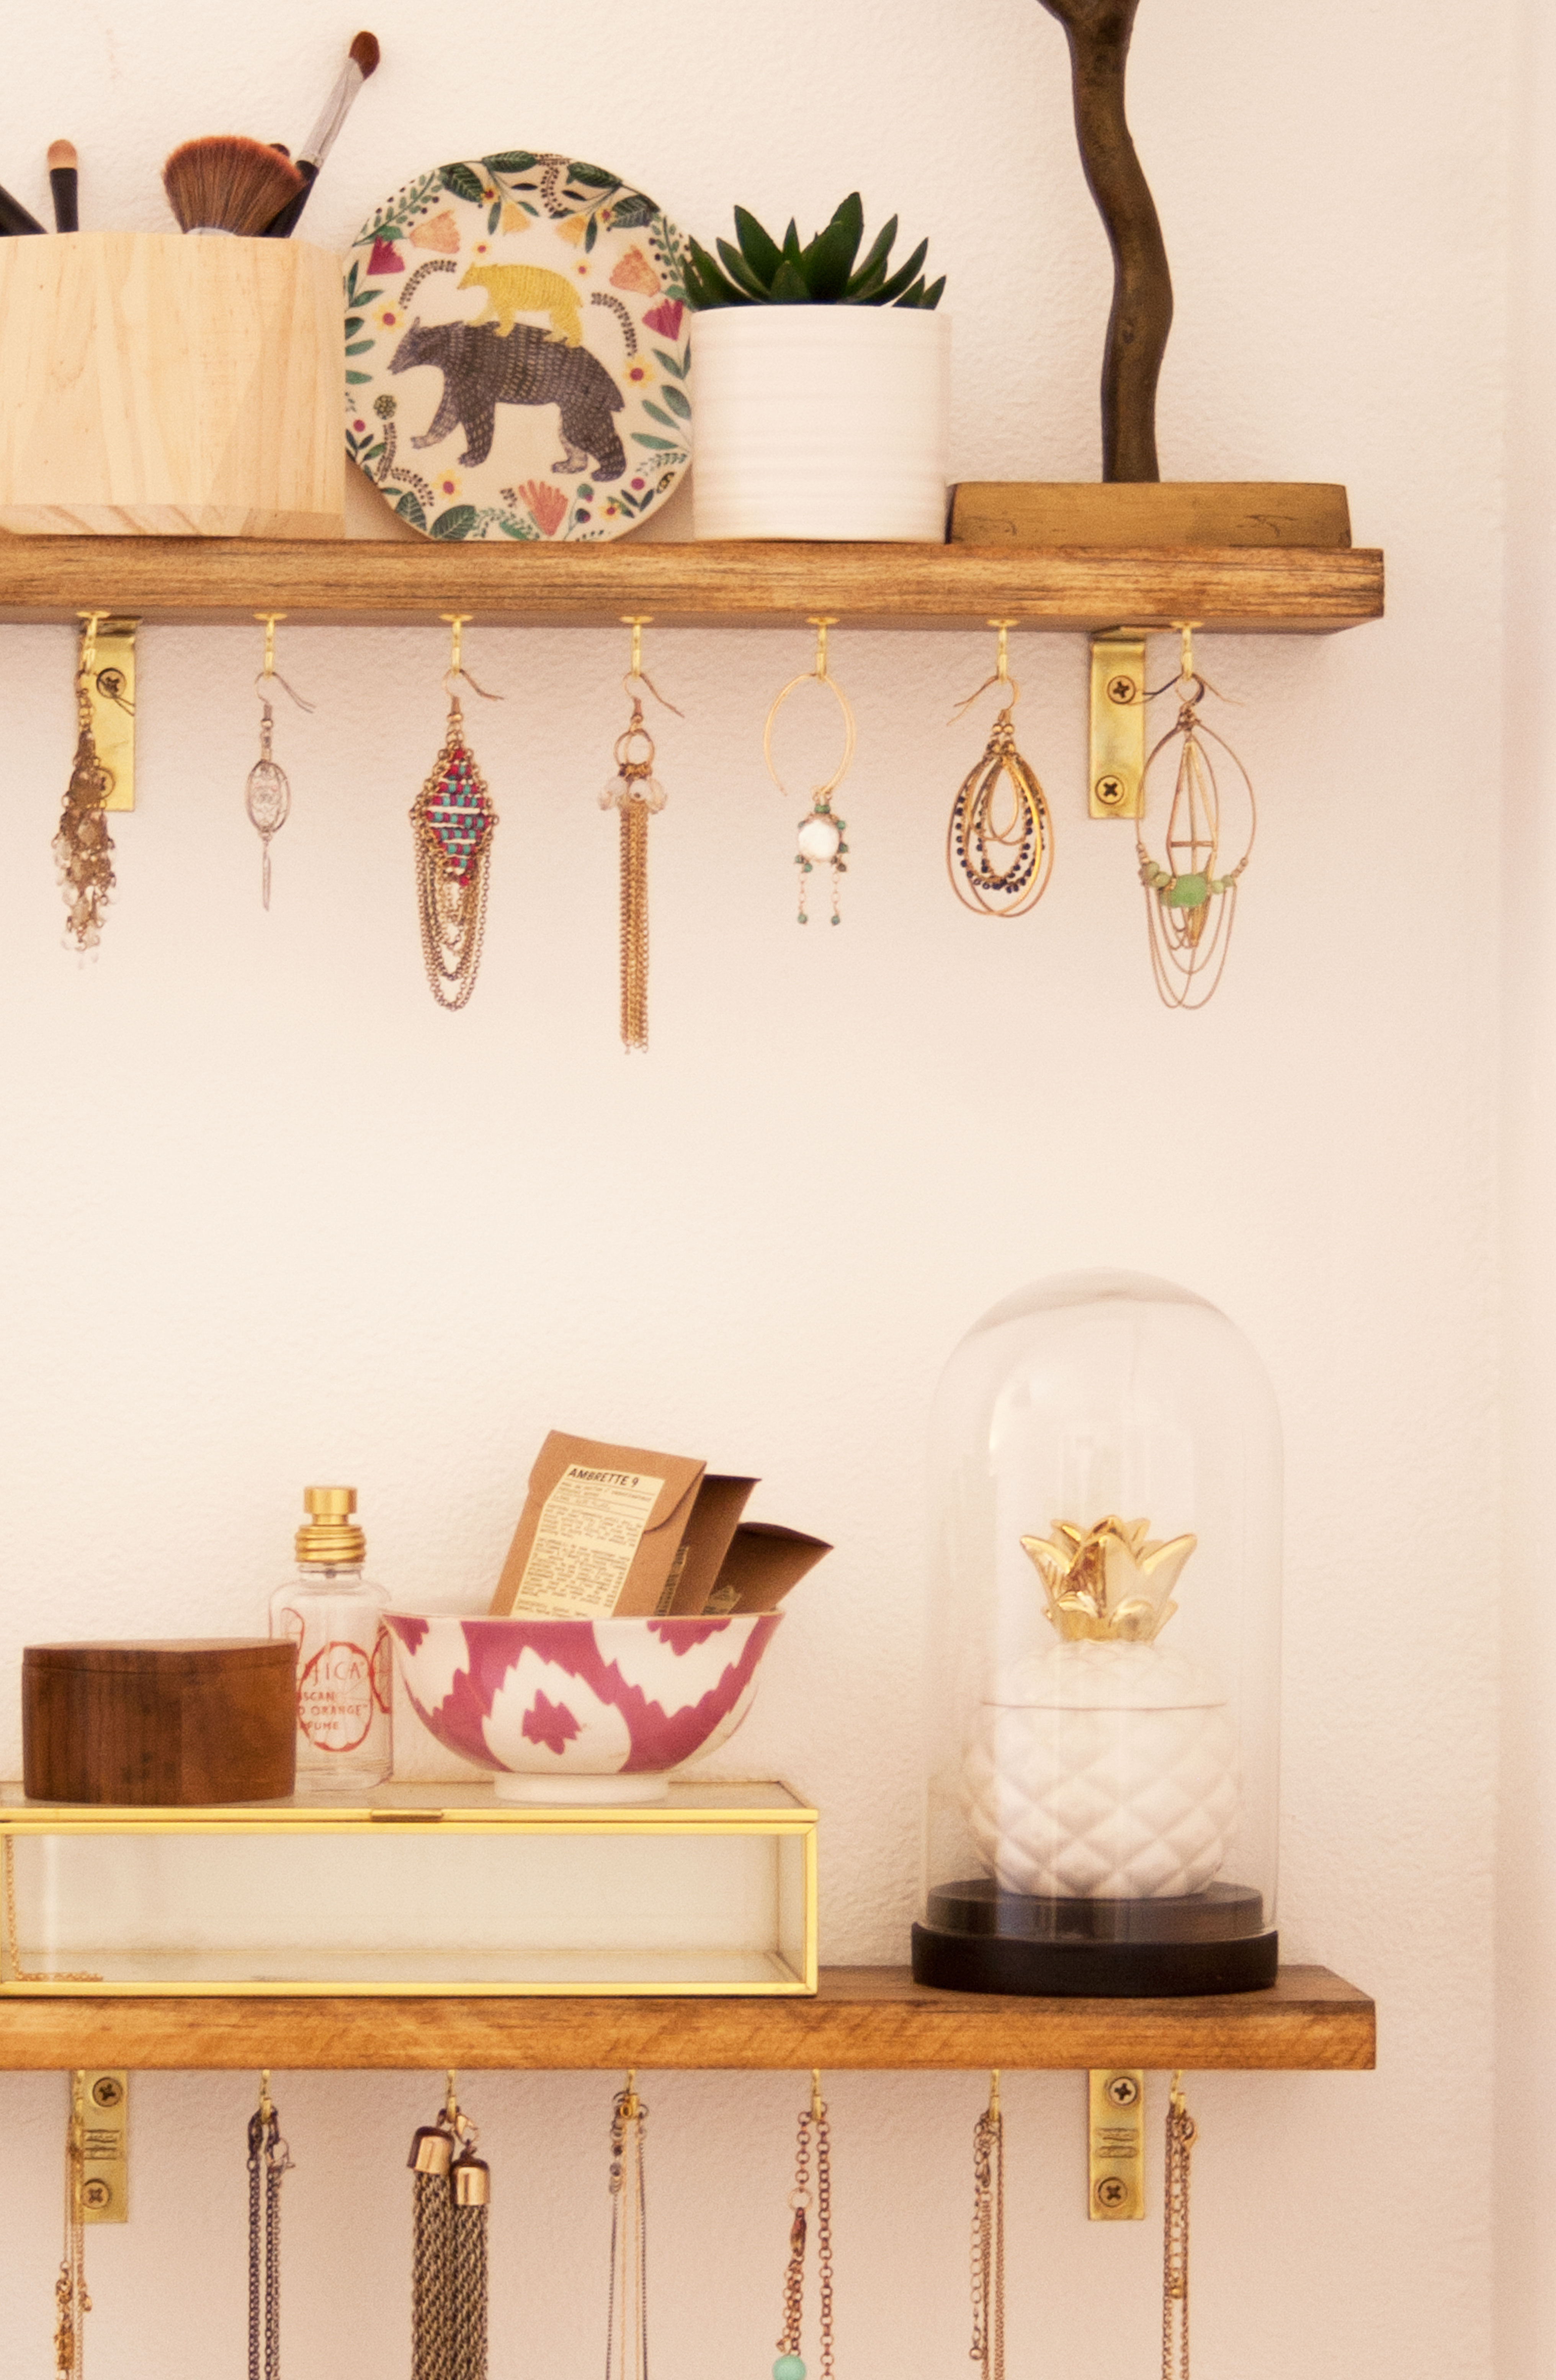
I only ended up using two out of the three shelves. I put the brass brackets in at a straight line but I would also recommend putting them in a staggered pattern. That way you can hang more without it looking too crowded. When screwing my jewelry shelves to the wall, I thought about how the earrings and necklaces would hang so I allowed enough room in between each self.
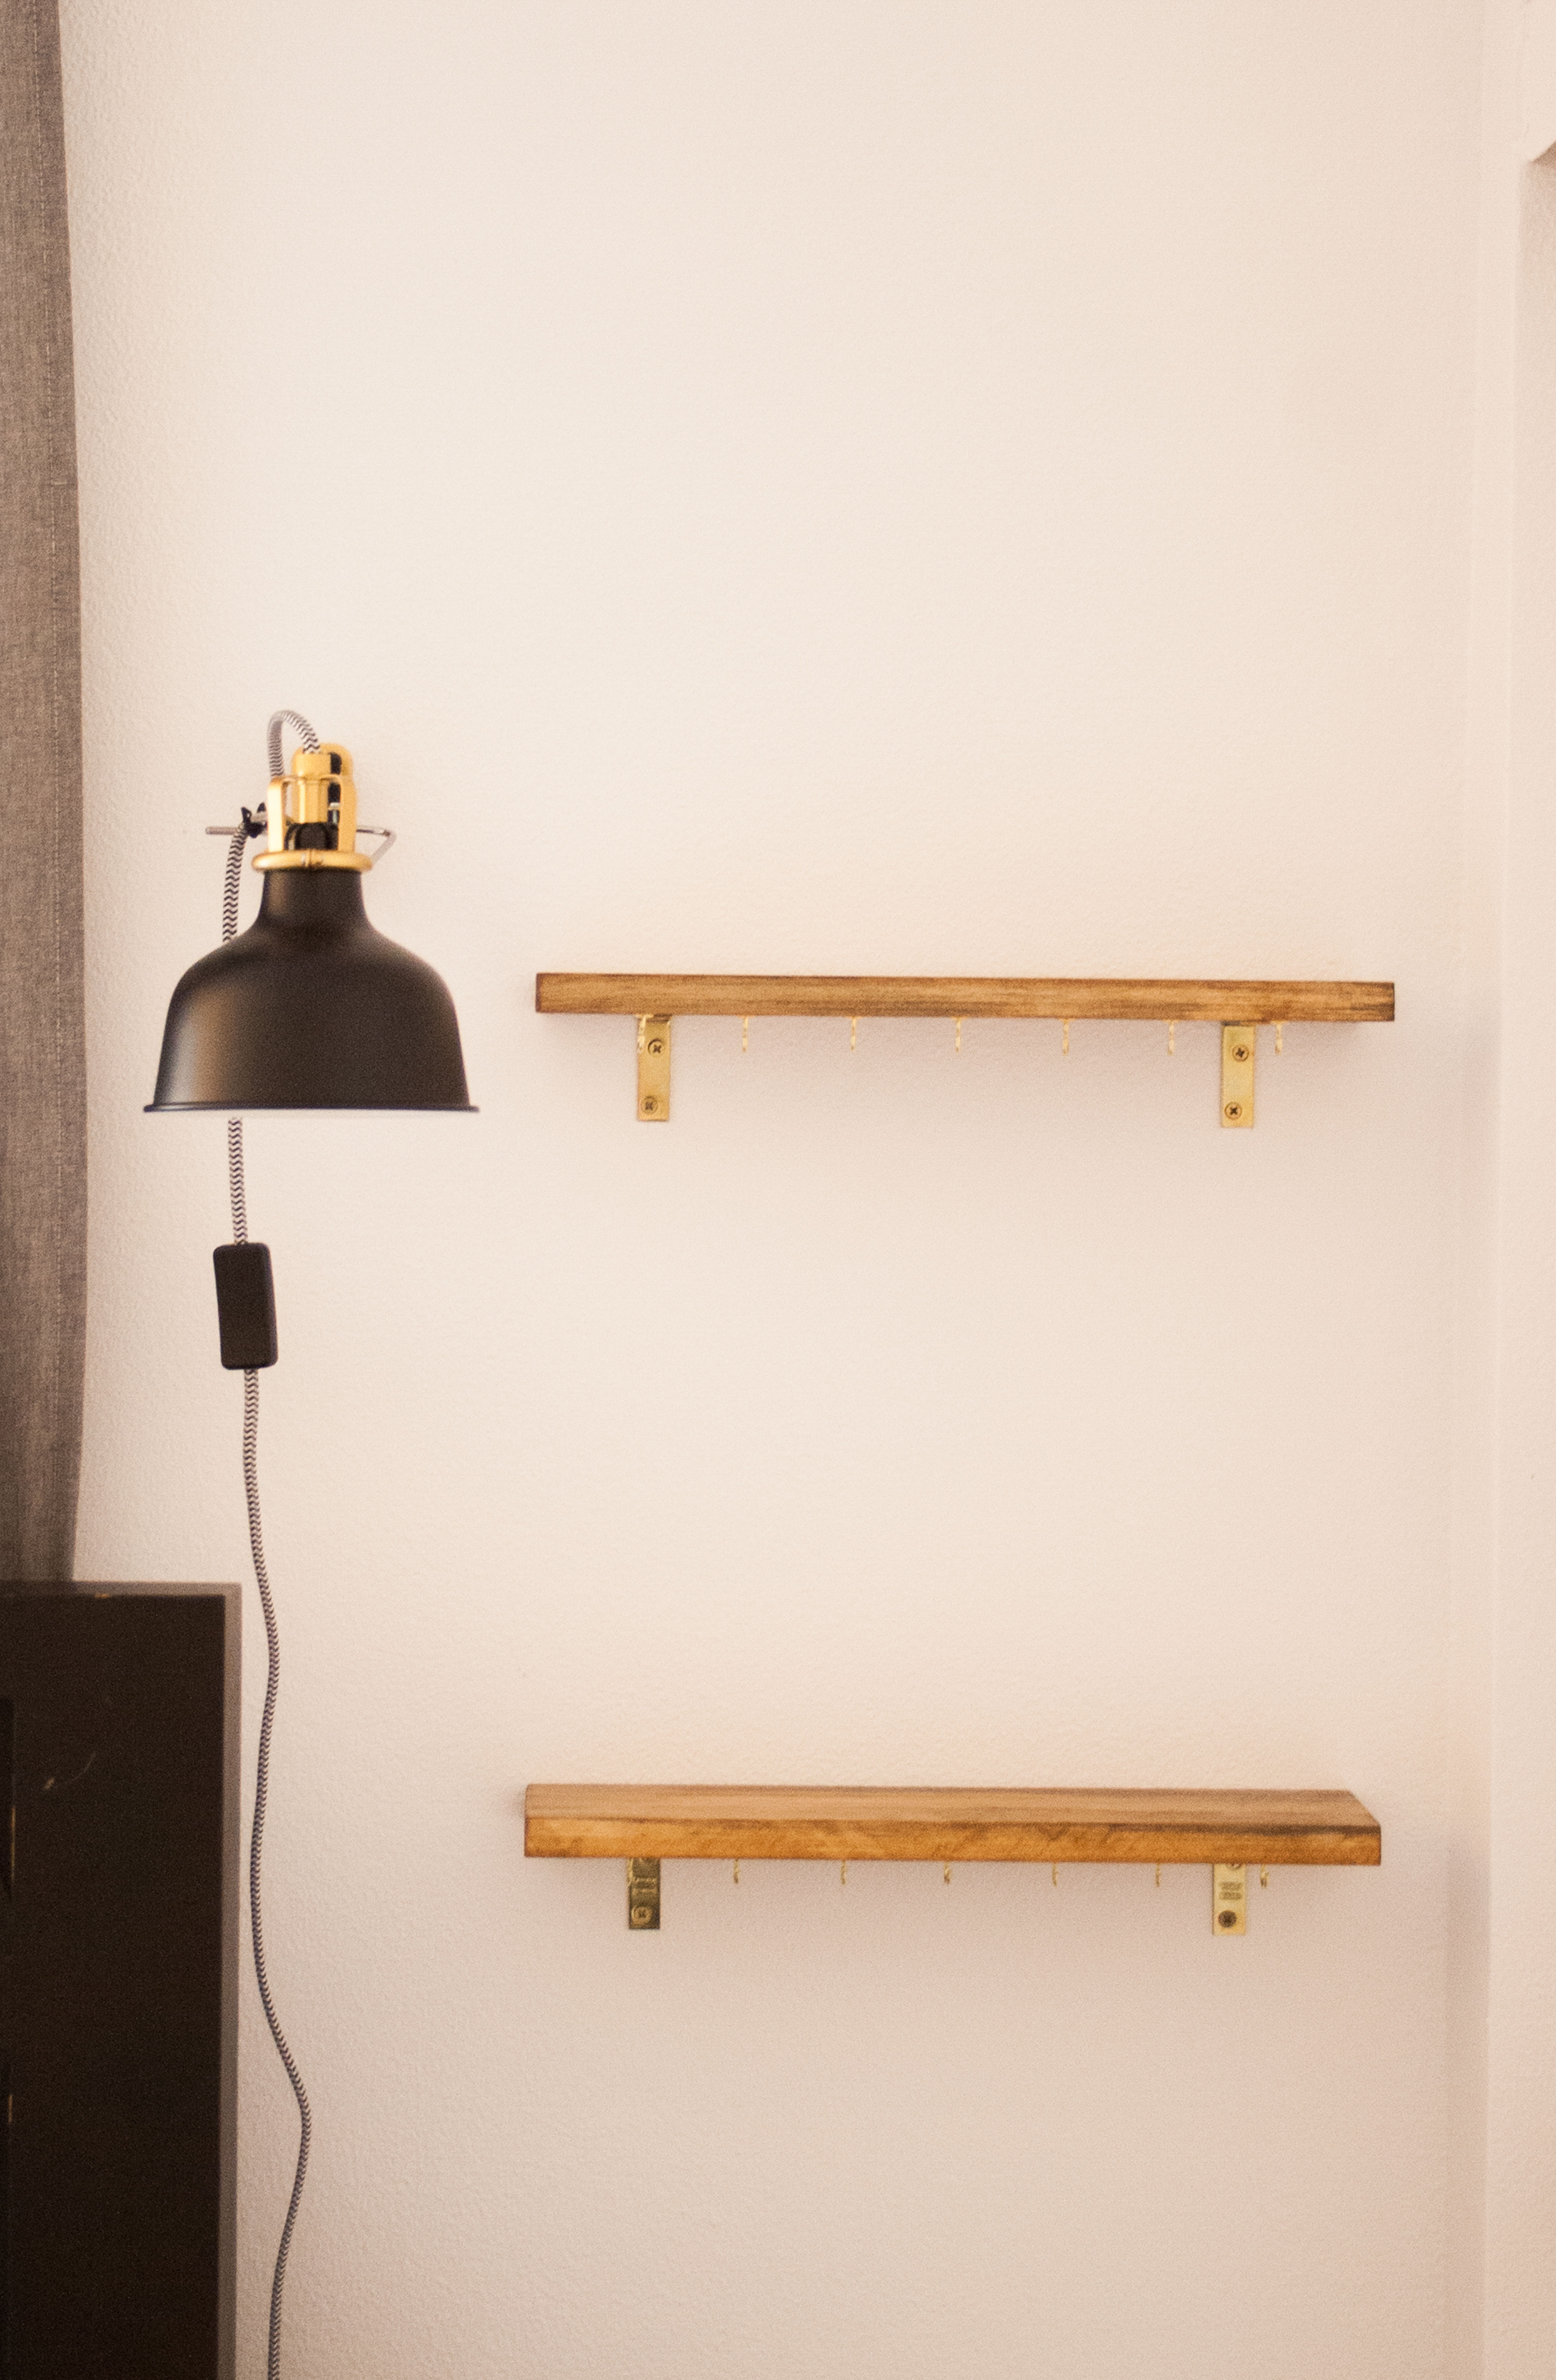
Here they are begging for some earrings and necklaces! Each shelf with wood, L bracket and brass hooks cost around $5 each! Not bad… not including the actual time it took for me to make these…

L O V E how these shelves turned out. I have a lot of small delicate things so this ends up being a great way to display them without everything looking too crowded.
FgrsTrult
viagra toronto headquarters online pharmacey viagra problems with kidney with viagra